.NET Integration - Quick Start Guide
The purpose of this guide is to outline how to perform a basic CrowdHandler .NET integration in your ASP.NET Core or ASP.NET MVC 5 application.
For further customization and advanced configurations, please refer to the project's GitHub repository or NuGet documentation.
1.) Add reference to your project.
This is easiest done using NuGet, find the Crowdhandler.MVCSDK package in the NuGet package manager, or alternatively, via the dotnet CLI.
dotnet add package Crowdhandler.MVCSDK
On .NET Framework, use the Package Manager console instead.
Install-Package Crowdhandler.MVCSDK
The package supports ASP.NET Core 6, 8, 9 and 10, and ASP.NET MVC 5 on .NET Framework 4.7.2 and later.
2.) Inject CrowdHandler Configuration.
* Public and Private keys can be found in the Account → API section of the CrowdHandler control panel.
ASP.NET Core via appsettings.json
{
  "Crowdhandler": {
    "PublicApiKey": "YOUR_PUBLIC_KEY",
    "PrivateApiKey": "YOUR_PRIVATE_KEY"
  }
}
Use user secrets or environment variables (Crowdhandler__PrivateApiKey) rather than committing the private key.
ASP.NET MVC 5 via web.config
<appSettings>
    <add key="CROWDHANDLER_PUBLIC_KEY" value="YOUR_PUBLIC_KEY"/>
    <add key="CROWDHANDLER_PRIVATE_KEY" value="YOUR_PRIVATE_KEY"/>
</appSettings>
* A full list of configurables and their default settings can be found in the configuration reference.
3.) Apply CrowdHandler to your requests.
ASP.NET Core
Register the middleware in your application start-up. It validates every request, so place it before static files, routing and endpoints.
Program.cs
using Crowdhandler.MVCSDK.AspNetCore;

var builder = WebApplication.CreateBuilder(args);
builder.Services.AddCrowdhandler(builder.Configuration.GetSection("Crowdhandler"));

var app = builder.Build();

app.UseCrowdhandler();
app.UseStaticFiles();
app.MapControllers();
app.Run();
To protect specific controller actions only, apply the filter attribute instead of the middleware.
ExampleTicketingController.cs
using Crowdhandler.MVCSDK;

namespace MyTicketingApp.Controllers
{
    public class TicketingController : Controller
    {
        [CrowdhandlerFilter]
        public IActionResult Index()
        {
            return View();
        }
    }
}
ASP.NET MVC 5
Apply the filter attribute to the controller actions you want to protect.
ExampleTicketingController.cs
using Crowdhandler.MVCSDK;

namespace MyTicketingApp.Controllers
{
    public class TicketingController : Controller
    {
        [CrowdhandlerFilter]
        public ActionResult Index()
        {
            return View();
        }
    }
}
To protect every action, register it globally in FilterConfig.cs.
filters.Add(new CrowdhandlerFilterAttribute());
Excluding URLs
Static assets (by file extension) are excluded from queueing by default. Set additional URL patterns to be ignored via the "Exclusions" setting, a regular expression containing the patterns you would like to not be considered for queueing. It can be given in appsettings.json or web.config (CROWDHANDLER_EXCLUSIONS_REGEX), or on the filter attribute as below.
Common patterns to ignore are:
- Paths used for storing static assets and media, e.g. /static-media/*
- Callback URLs made by third-party payment providers.
- JSON and RSS feeds.
[CrowdhandlerFilter(Exclusions = @"^(/contact-us.*)|(/api/.*)|(^[^?]*\.(css|js|png|jpg|gif|svg|ico|woff2?)(\?.*)?$)")]
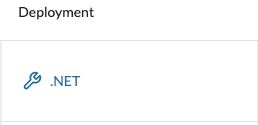
4.) Change integration type to .NET in CrowdHandler control panel.
Deployment selection can be done from the domains screen.
5.) What Now?
Once you have completed the .NET integration steps we recommend checking out our getting started guide which will help familiarize you with creating and configuring waiting rooms from within the CrowdHandler control panel.